iOS Animation - Interact With Constraint In Code
Learning notes for book iOS Animations by Tutorials.
Auto layout is a powerful tool to create app interface. Developers can pre-set the constraints for a view. How to change a certain constraint to create animation?
Suppose we have a title label which lays on a menu UIView and looks like this.
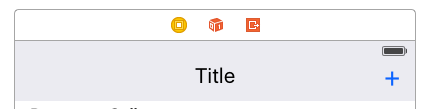 Title label on a UIView called menu view
The constraints for Title Label are
 Constraints for Title Label
Now, I want to push the title label to the left by 100pt. I could add -100 constant to titleLabel.CenterX. There are multiple ways to do it.
- using outlets
In ViewController.swift, add an IBOutlet which is a NSLayoutConstraint.
1 | weak var labelCenterXConstraint: NSLayoutConstraint! |
Then open the storyboard and link the correct constraint to the outlet.
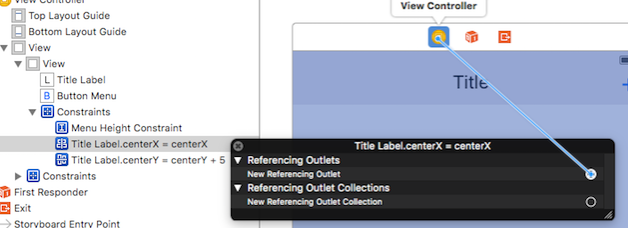 Right click the constraint, the drag new referencing outlet to view controller
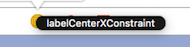 click the right outlet for this constraint
Done! Now we can change the constraint using this outlet. The code is:
1 | labelCenterXConstraint.constant =-100.0 |
- find the certain constraint in all superview’s constraints
You can print out all the constraints for title label’s superview using this code:
1 | for constraint in titleLabel.superview!.constraints { |
And you will see something like this:

But how can we find the certain constraint we want?
First, let’s look deep into the constraint. By click the title label centerX constraint, you will see the details for this constraint in right tool bar.
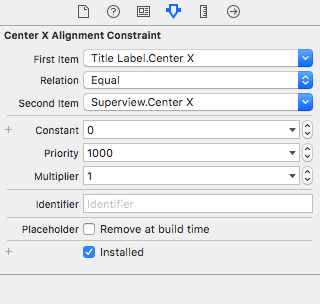
You can see that a constraint has several properties such as First Item, Relation, Second Item, Constant and so on. And in First item, the Center X is the attribute of title label.
The Attributes inspector is laid out to present constraint information in a way that reflects a linear equation, such as the following for an equality relation:
1 | FirstItem.Attribute1 = (SecondItem.Attribute2 * Multiplier) + Constant |
So, for here is:
1 | titleLabel.CenterX = (Superview.CenterX * 1) + 0.0 |
Back to how to change the constraint. To identify the title label centerX constraint, we need to identify the FirstItem which is titleLabel and its attribute which is CenterX. The code is:
1 | for constraint in titleLabel.superview!.constraints { |
Here is an easier way. You can set identifier for a constraint.
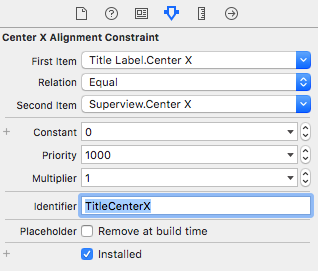 Set the identifier to TitleCenterX
The code:
1 | if constraint.identifier == "TitleCenterX" { |
Now, we know how to change the constraint by code. How to create animation?
Well, after you changed the constraints, you need to update them by calling:
layoutIfNeeded()
If you hadn’t called layoutIfNeeded(), UIKit would have performed a layout anyway since you changed the constraints, but which marked the layout as dirty.
You can put layoutIfNeeded() into an animation closure to make animation. For example:
1 | // change label centerX's constant |
The original post is on Jun 1, 2016.